
Introduction:
CI/CD (Continuous Integration / Continuous Delivery) pipeline is a combined process of continuous integration and continuous deployment or continuous delivery. CI/CD pipeline automates the building, testing and deployment processes, it connects the gap between development and operations. If we push the code to GitHub or GitLab, CI/CD pipeline automatically builds, tests and deploy your application. We can find errors and bugs in development builds before moving to production.
CI/CD pipeline provides faster releases, it increases productivity, CI/CD pipeline helps to deliver your application more reliable, efficient and faster it streamlines the development process.
In this tutorial we have explained how to setup ci/cd pipeline for angular projects with GitHub Actions.
What is Git Actions:
Git actions is a CI/CD pipeline feature it comes along with GitHub, with git actions we can automate a building, testing and deployment processes of our application, you can write a custom workflow or you can use git actions library to automate your CI/CD pipeline process, lets begging ci/cd pipeline setup process for your angular project.
Prerequisites:
- GitHub Account
- Angular Project
- AWS EC2 Instance
Setup SSH keys for GitHub Actions:
To deploy your angular application into your ec2 instance we need to give SSH access to GitHub for deploying your application on AWS EC2 instance.
Login AWS EC2 Instance:
After login your AWS EC2 instance now runs the following command, it ask it will creates two file named id_rsa and id_rsa.pub, the id_rsa contain your private key and id_rsa.pub contain public key.
ssh-keygen -t rsa -b 4096
Create Secrets:
Step 1:
In you EC2 terminal open id_rsa.pub and copy the content from id_rsa.pub file.
cat id_rsa.pub

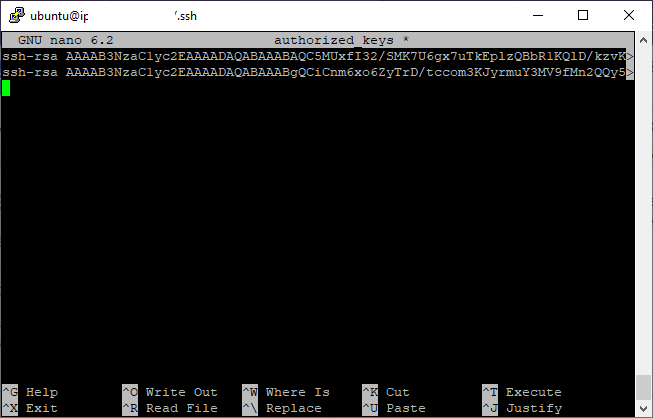
Step 2:
Open authorized_keys and paste the copied key from id_rsa.pub under the key that already exists then save and close the file.
sudo nano authorized_keys
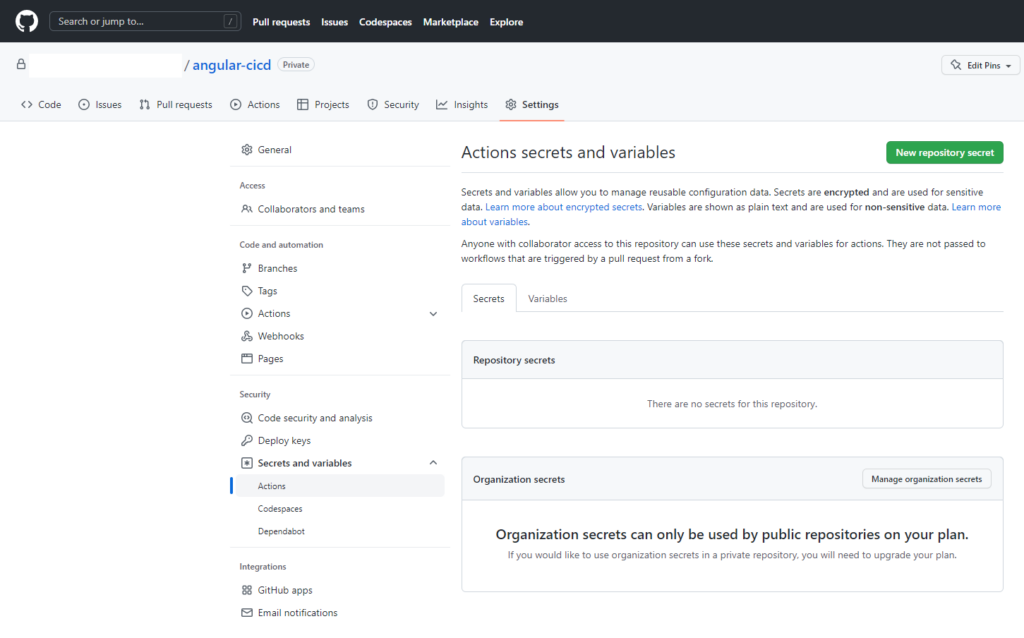
Step 3:
Now go to your GitHub repository and go to settings and click Secrets and variables->Actions, you will see the New repository secret button.
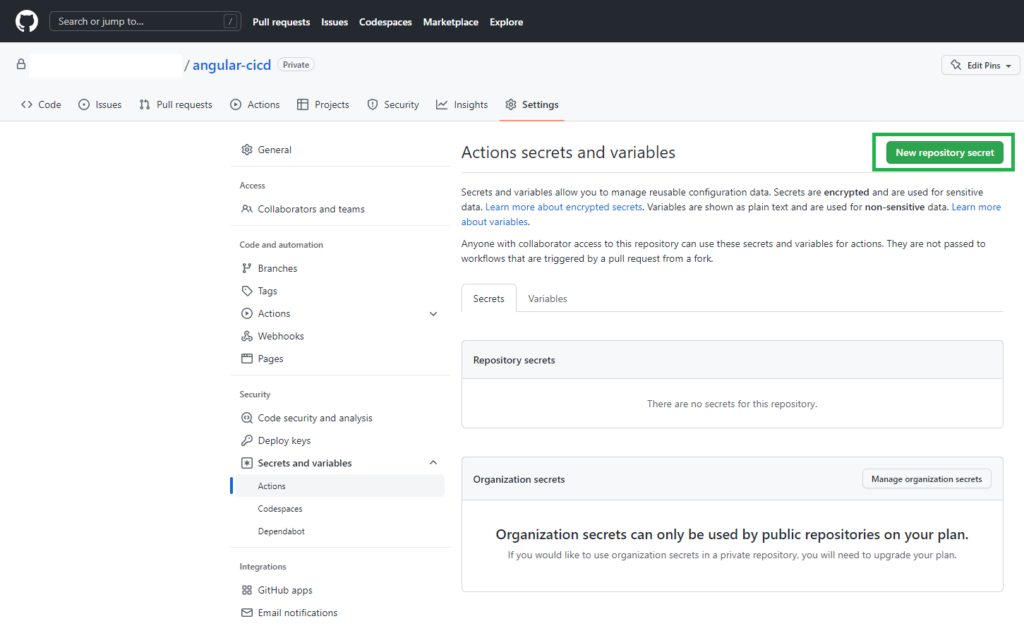
Step 4:
Click New repository secret and give a name for your secret and paste your secret keys, hostname and username, let’s create secrets one by one.
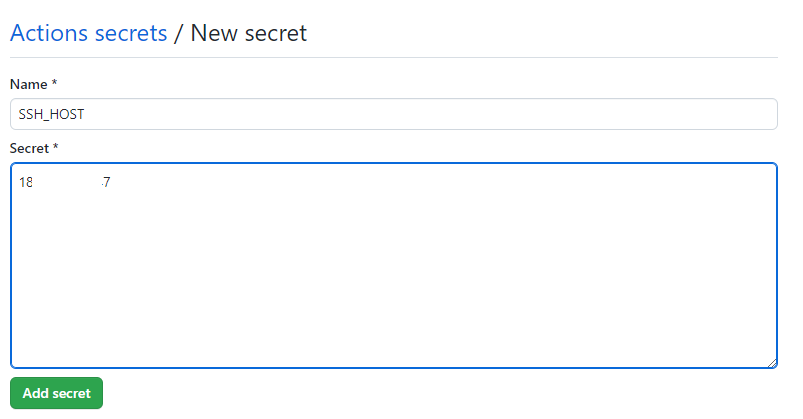
Step 5:
To create a hostname secret click a new repository secret button, name your secret for your hostname SSH_HOST and paste your hostname or ip address.
Step 6:
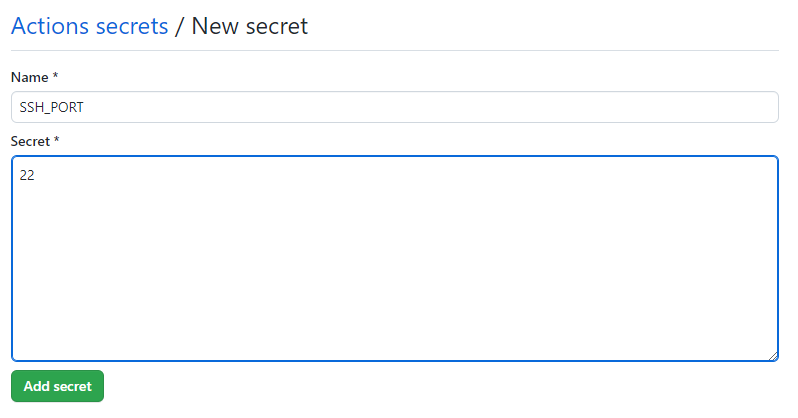
Next create secret for SSH_PORT
Step 7:
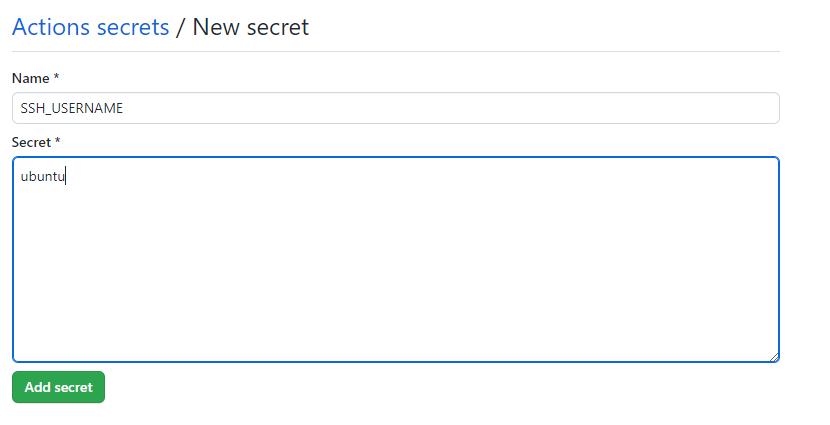
Next create a username secret, to create a username secret click a new repository secret button, name your secret for your username SSH_USERNAME
Step 8:
Before creating a secret for your private key, go to your terminal and run the below commands
cd .ssh

cat id_rsa
Now copy the content and go to GitHub secrets.
Step 9:
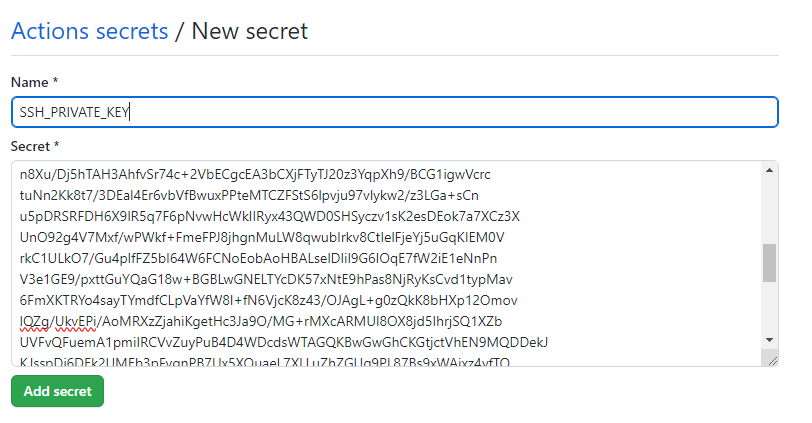
Next we need to create a secret for our private key, to create a username secret click a new repository secret button, name your secret for your private key SSH_PRIVATE_KEY
That’s all we have configured all the required secrets for SSH for GitHub access to deploy our angular application on EC2 instance.
Before creating workflow for your angular project, we have to install web server on our EC2 instance, if you have already installed web server on your EC2 instance just ignore this step and move to the next step, we will install apache web server for this tutorial.
Create CI/CD Workflow for Git Actions:
Step 1:
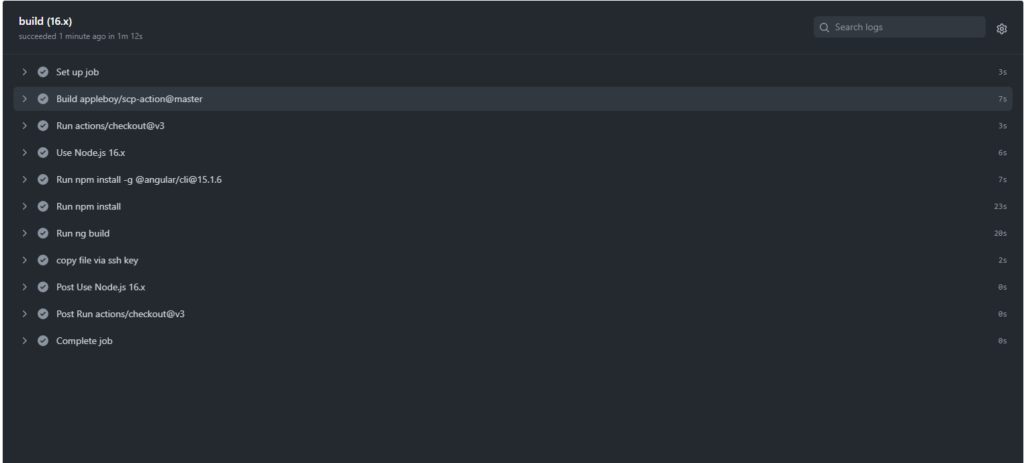
After pushing your code to the git repository, let’s start to write the git action workflow for your angular project. Go to your git repository, you will see the actions tab, click that actions tab now you will see the some templates, we use our custom workflow to deploy our angular application to EC2 instance. Click setup a workflow yourself and paste the below content on your yaml file and click start commit.
name: Angular Main

on:
  push:
    branches: [ "main" ]
  pull_request:
    branches: [ "main" ]

jobs:
  build:

    runs-on: ubuntu-latest

    strategy:
      matrix:
        node-version: [16.x]

    steps:
    - uses: actions/checkout@v3
    - name: Use Node.js ${{ matrix.node-version }}
      uses: actions/setup-node@v3
      with:
        node-version: ${{ matrix.node-version }}
        cache: 'npm'
    - run: npm install -g @angular/[email protected]
    - run: npm install
    - run: ng build

    - name: copy file via ssh key
      uses: appleboy/scp-action@master
      env:
          HOST: ${{ secrets.SSH_HOST }}
          USERNAME: ${{ secrets.SSH_USERNAME }}
          PORT:  ${{ secrets.SSH_PORT }}
          KEY: ${{ secrets.SSH_PRIVATE_KEY }}
      with:
          source: "./dist"
          target: "/var/www/html/"
strip_components: 2 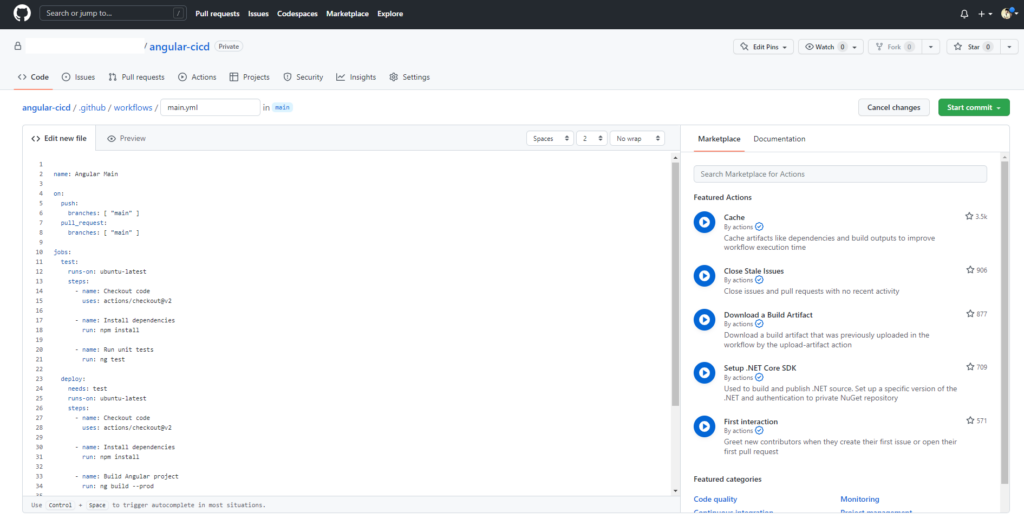
Step 2:
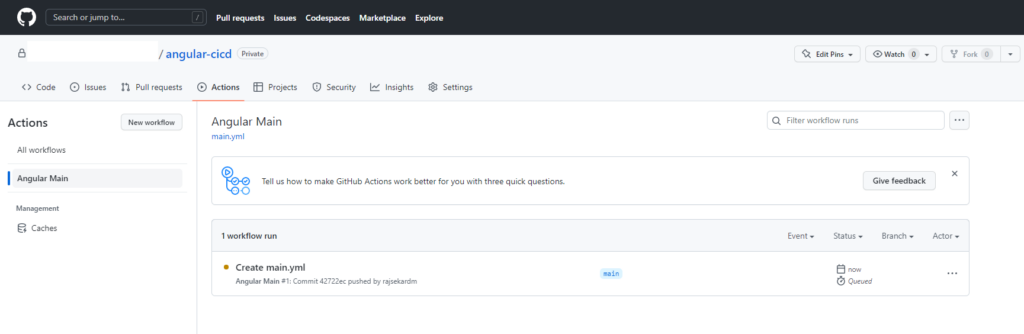
After the commit github will create a yaml file for your workflow inside the .github/workflows folder, when the file was created git actions CI/CD pipeline will start running, you will see the workflow processes on actions tab.
Step 3:
That’s all we configured and deployed ci/cd pipeline for angular project with git actions and AWS EC2 instance successfully.
Step 4:
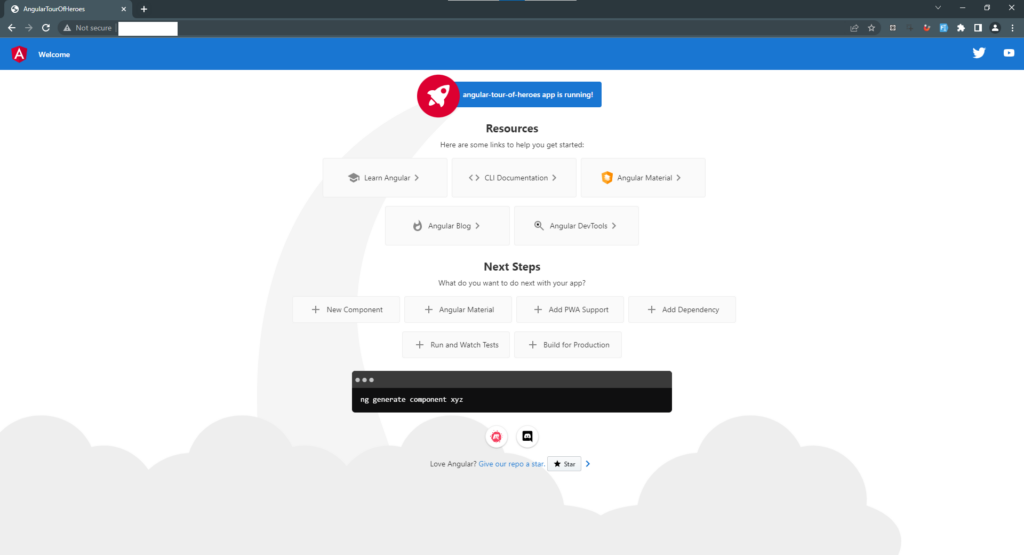
To check our angular code deployed correctly to EC2 instance, access the IP of your EC2 instance on your browser, now you will see your angular application.
Conclusion:
We have learned how to setup CI(Continuous Integration)/CD(Continuous Deployment) with GitHub actions and EC2. Hope this helps to build your next angular project.
