Facing any dns related issues or internet connection problems we need to flush windows dns resolver cache. If you are not able to access the internet or some webpages, you have to flush the dns cache or dns resolver cache on windows. Flushing the dns cache can resolve the dns related problems. This tutorial applies to windows 10, windows 8.1, windows 7.
Flush windows dns cache:
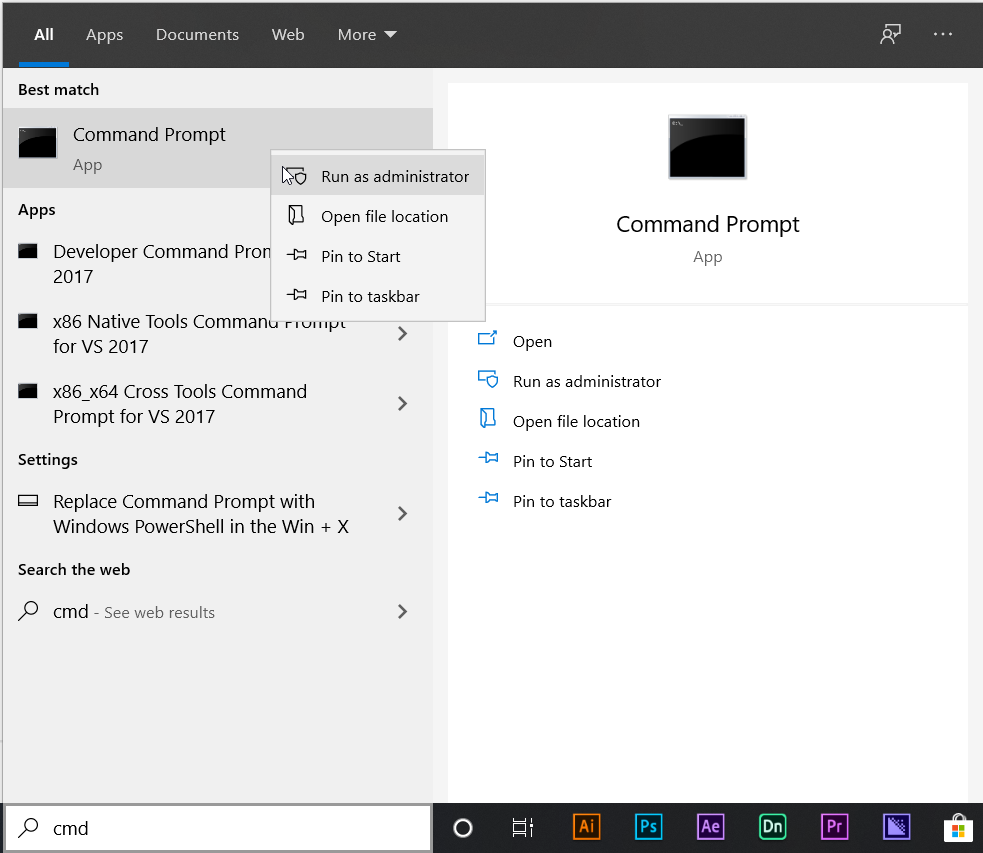
Type cmd on windows 10 search bar then right click on command prompt and run as an administrator
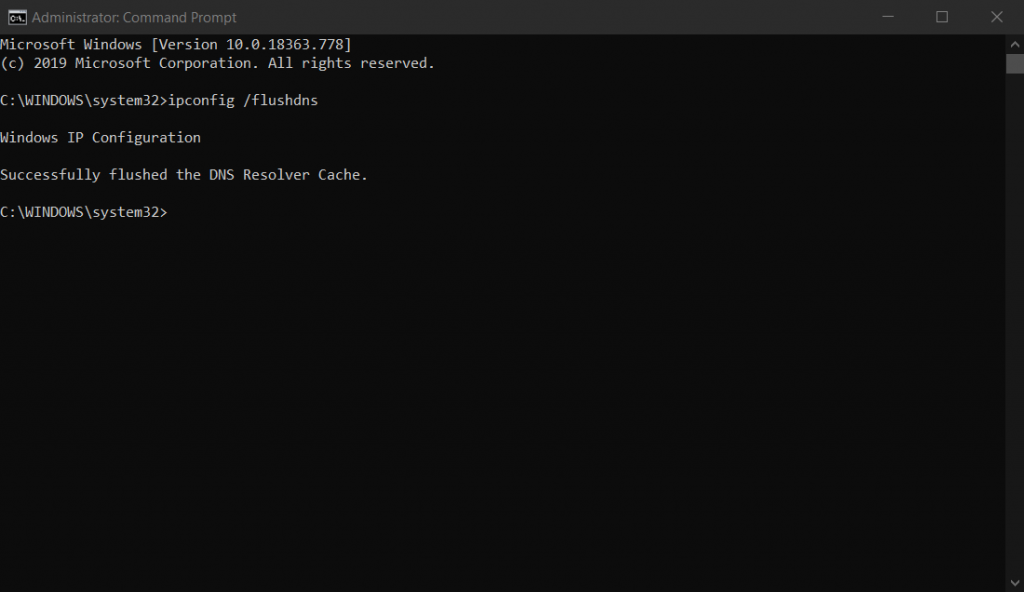
To flush windows dns cache copy the following command and paste into command prompt then click enter to clear the dns cache:
ipconfig /flushdns
Now dns cache has been cleared on your windows. After clearing dns cache you have to restart the computer
Display dns:
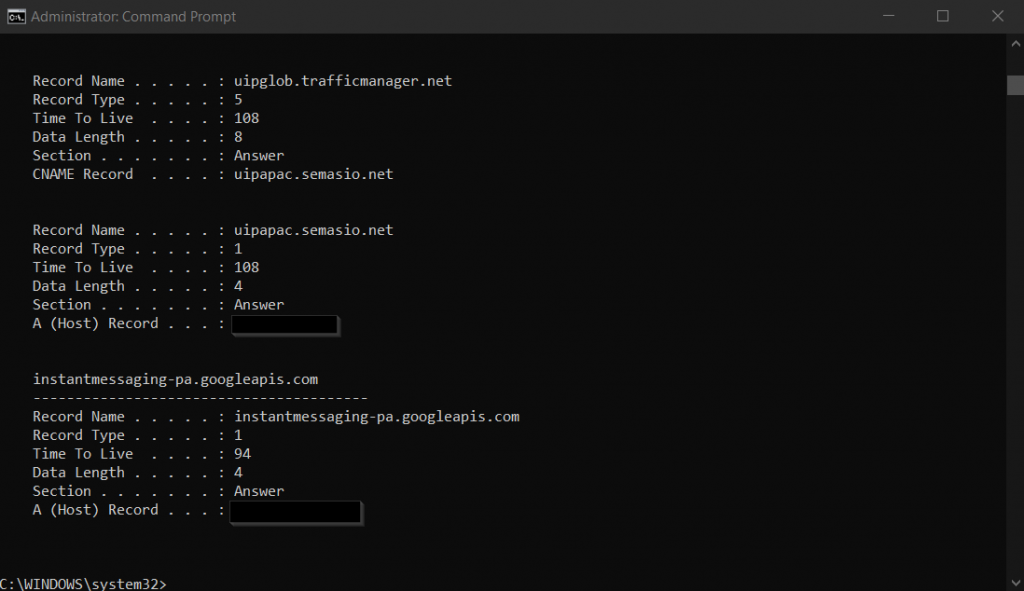
To confirm if the dns cache has been cleared or not. Type the command below:
ipconfig /displaydns
Now you can see the dns cache details
Disable or enable dns:
To enable the dns cache on windows 10 computer you have to run the following command:
net stop dnscache
To disable the dns cache on windows 10 computer you have to run the following command:
net start dnscache